

Key Takeaways
Why Physical Inspection Still Matters
Product listings have never been more detailed - specifications, material breakdowns, and user-submitted photos are all standard. Yet in-person inspection remains irreplaceable. Weight, rigidity, finish texture, and mechanical feel are qualities that photographs and spec sheets cannot fully convey. Once you know the specific cues to look for, a fifteen-minute inspection delivers more reliable quality information than hours of online research alone.
This guide walks through the most useful physical checks by room, focusing on the construction signals that consistently distinguish durable goods from disposable ones. For a deeper read on how material terminology maps to actual longevity, see our companion piece on what construction labels really indicate.
Bring a Small Flashlight
A pocket flashlight or your phone's torch lets you examine the underside of furniture, peer into cabinet corners, and check appliance seams where showroom lighting never reaches. Uneven finishing, rough edges, or excess adhesive become immediately visible under direct light.
What You'll Need
The inspection process is low-tech by design. A few simple items make it significantly more effective.
Pocket flashlight or phone torch
Illuminates undersides, joints, and interior corners that showroom lighting obscures.
Notepad or notes app
Records model numbers, observed defects, and questions to follow up on before purchasing.
Tape measure
Confirms stated dimensions and checks that doors, drawers, and panels align within acceptable tolerances.
Magnet
Tests whether 'stainless steel' surfaces are ferrous blends or higher-grade non-magnetic alloys.
What you will need
Floor Models May Not Reflect Production Quality
Showroom samples are often handled by hundreds of shoppers and may have been repaired or adjusted by store staff. Always ask whether you can inspect a boxed unit, or at minimum check that the floor model's defects are clearly reflected in any discount. A pristine showroom piece does not guarantee the boxed version ships in equivalent condition.
Room-by-Room Inspection Steps
Follow these steps in sequence during your in-store visit. Each step is designed to be completed in under ten minutes per room.
Gather Your Tools and Specs Before You Arrive
Download or screenshot the product's full specification sheet before visiting the store. Pay particular attention to listed materials, stated dimensions, and country of manufacture. Having this on hand lets you compare marketing claims against what you actually find during inspection. Bring a flashlight, a tape measure if you need precise fit confirmation, and your notepad.
Living Room: Evaluate Seating and Case Furniture
For sofas and upholstered chairs, press firmly on seat cushions and armrests. Quality foam rebounds within a few seconds; cheap foam compresses and stays depressed. Check the frame by gently racking the piece side to side - minimal flex indicates solid frame construction. Lift one corner slightly: pieces with hardwood frames are noticeably heavier than those built on engineered wood.
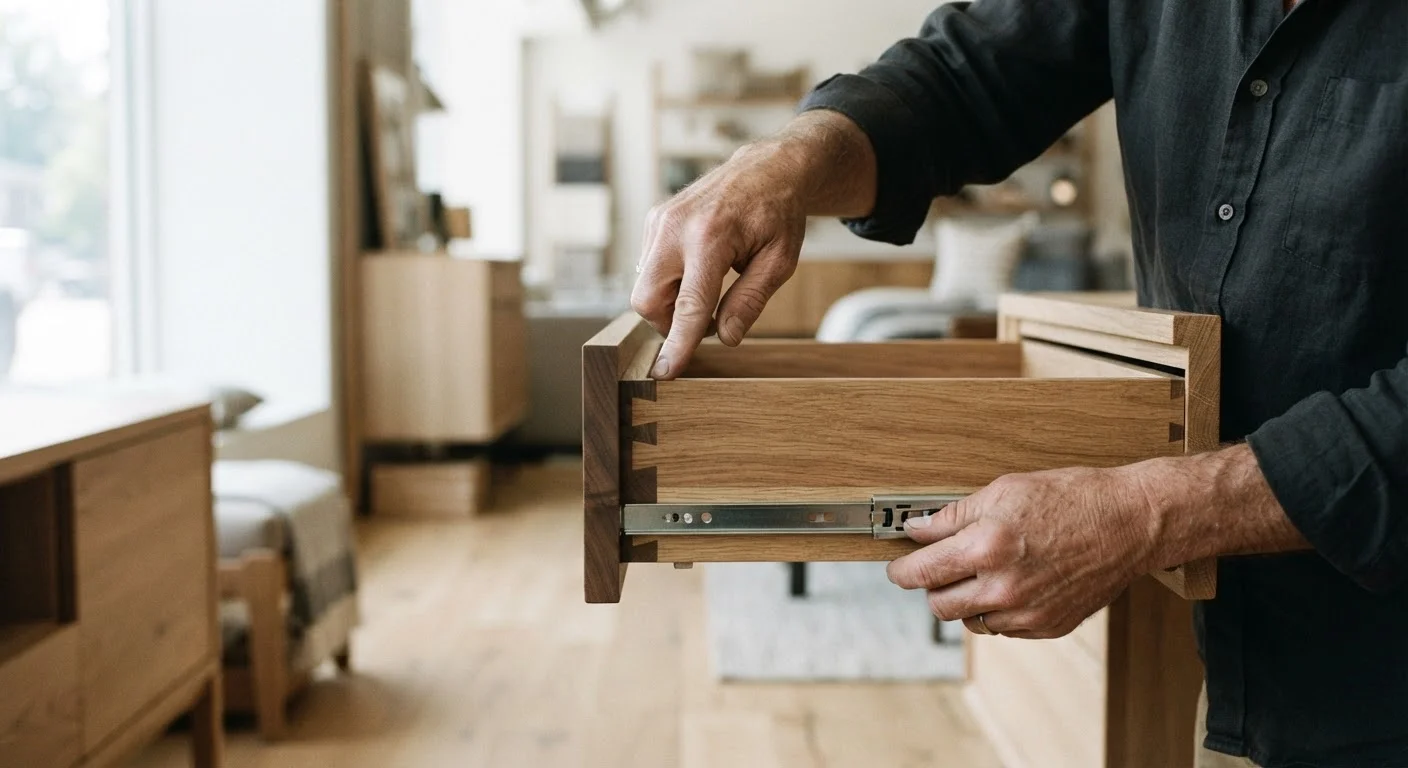
For case furniture (bookshelves, media consoles), open every door and pull every drawer. Drawer slides should operate smoothly with no side wobble. Look underneath and at the back panel - quality pieces use thicker backing fastened into a dado channel, not thin cardboard-weight panels stapled on. Check corner joints for dovetail or mortise-and-tenon construction rather than metal cam locks alone.
Kitchen: Inspect Appliances and Cabinetry
Open and close appliance doors - refrigerators, dishwashers, and ovens should seal firmly with a magnetic gasket that grips evenly around the full perimeter. Test door hinges for smooth, dampened movement; loose or squeaky hinges on a floor model often indicate lightweight hardware. Run your hand along appliance exteriors: surface finishes on higher-quality units feel consistent and cool, not plasticky or warm from thin metal.
For cabinetry, look at drawer box construction. Plywood drawer boxes outperform particleboard ones under moisture exposure. Check that door hinges are fully adjustable (six-way adjustment is a positive sign) and that doors hang level without manual coaxing. Finish consistency matters too - open a cabinet and check whether interior surfaces are finished or just raw particleboard.
If you are considering a secondhand unit, the used appliance inspection checklist covers condition and warranty factors specific to that context.
Bedroom: Assess Mattresses and Storage
For mattresses, press evenly across the entire surface - edge support is especially telling. Sit on the edge and feel whether the perimeter holds or buckles. A mattress that loses significant height at the edges will limit usable sleep area over time. Check the cover fabric for stitching consistency and zipper quality if a removable cover is included. The full mattress selection guide covers support core and firmness factors in greater depth.
For dressers and wardrobes, repeat the drawer-slide and joint checks from Step 2. Additionally, inspect the back panel attachment and confirm that the piece stands level on the showroom floor without shimming.
Document, Compare, and Decide
After completing your room-by-room inspection, review your notes against the stated specifications. Flag any discrepancies between claimed materials and what you observed. If evaluating multiple options, use your notes to compare construction quality side by side rather than relying on price as a proxy for durability.
Before finalizing any online purchase, confirm return terms and seller legitimacy. The pre-purchase online checklist addresses those variables specifically. For tech-enabled products, consider reviewing smart device compatibility questions as a parallel step.